- Home
- BLUE SENSOR CALIBRATION
Frequently Asked Questions
BLUE SENSOR CALIBRATION
**USAGE AND SETTINGS:**
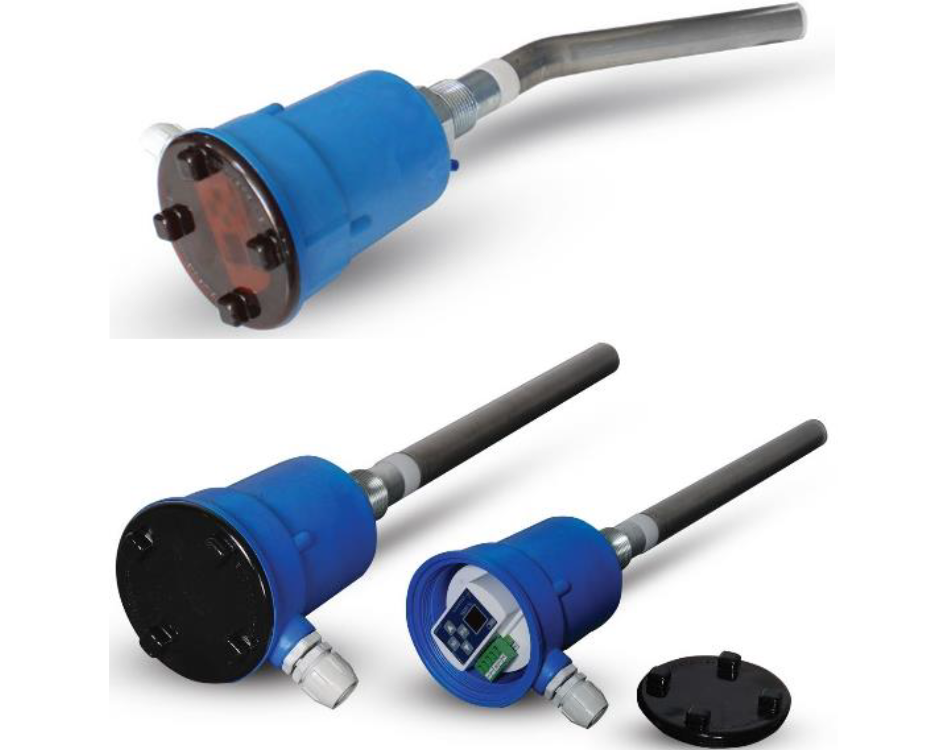
The device has a total of 4 program settings. These are adjusted to determine how the device will operate. In addition to these, there are 2 buttons for lower and upper calibration options. To enter the programs, the button is held down for approximately 2 seconds. When entering the programs, ‘P0’ appears on the screen. Programs can be navigated between using the <↑> and <↓> buttons. When the desired program is to be entered, the button is pressed. After adjusting the relevant program settings with <↑> and <↓>, if you want to save, the button is pressed; if you want to exit without saving, the button is pressed. To return to the operating mode, the button is pressed again and the measurement value is displayed on the screen.
P0 – Relay Output Value: Can be adjusted between 0 and 99. At this value, the relay becomes active. By setting it to the desired value, a signal can be obtained independently from the relay contact terminals when the level is at the desired value.
P1 – Hysteresis Value: This value is the difference between the activation value and the deactivation value of the relay. If the measurement is fluctuating (due to rapid changes in the level, etc.), this value prevents the relay from switching on and off rapidly. It should be set to an appropriate value depending on the application.
P2 – Relay Output Type (Operation Mode):
0 => Relay output disabled.
1 => Relay continuously on.
2 => Pulls when the set value is reached, leaves it below the set value by the amount of hysteresis value. (Direct logic)
3 => Leaves when the set value is reached, pulls below the set value by the amount of hysteresis value. (Inverse logic)
P3 – Reserved Menu: Closed menu.
P4 – Calibration Information Codes and Automatic Calibration:
This menu includes calibration-related information codes, measurement-related information, and settings related to calibration intervals stored in memory.
Calibration Error Codes:
1o => Upper calibration is greater than lower calibration, so the calibration is correct.
1E=> Lower calibration is greater than upper calibration, so the calibration is incorrect.
2o=> The difference between upper calibration and lower calibration is suitable for scaling.
2H=> The difference between upper calibration and lower calibration is large; not suitable for scaling.
2E=> The difference between upper calibration and lower calibration is small; not suitable for scaling.
3o=> The incoming instantaneous capacity value is within the set calibration range.
3H=> The device is at 99; the incoming instantaneous capacity value is greater than the upper calibration value.
3A=> The device is at 00; the incoming instantaneous capacity value is smaller than the lower calibration value.
CALIBRATION:
The calibration of the device can be done as follows. Upper or lower calibration is performed using the <↑> and <↓> buttons on the device. <↑> is used for upper calibration; <↓> is used for lower calibration. To perform upper calibration, the <↑> button should be pressed for ~2 seconds while in normal measurement mode. Similarly, for lower calibration, the <↓> button should be pressed for ~2 seconds.
When calibration is completed, ‘o’ flashes on the screen three times, and the new measurement value is displayed on the screen (Normally, ‘0’ is displayed after lower calibration, ’99’ is displayed after upper calibration). This completes the calibration process.
Calibration is done in 2 steps. The 1st step is lower calibration, which determines the zero point. For this, the probe tip is brought to the lowest level of the level to be measured. Calibration is performed as explained at this point. After calibration, ‘0’ should be displayed on the screen. Lower calibration should not be done in the air. Since the capacitance in the air may differ from the capacitance at the lowest level, the probe will show a value other than ‘0’ when at the lowest level.
Similarly, upper calibration should be done after the probe is brought to the highest level. This way, the two points are scaled properly.
During calibration, it is important for the measured capacitance to be as constant as possible to ensure the calibration is accurate. Poor ground connection or lack of contact between the ground board and the probe board, as well as contact failures, can cause calibration problems and unexpected changes in capacitance and values during normal measurements.
The object being calibrated must be within the measurement range of the sensor. Otherwise, the lower and upper points may not be scaled accurately.
If for any reason the lower or upper calibration is not correct, calibration should be renewed taking into account the above warnings. Lower and upper calibration can be done independently of each other.